How To Add "NANG IT!" Button on Blog Post


As requested by some readers, here is how to add the "NANG IT!" button in a blog post.

First, type your blog post and publish it. After that, submit your post to INNIT and you'll get the URL for the post in INNIT.

You can obtain the INNIT URL link from the address bar above right after you submit your post.


Next, put this code in the HTML section of your blog post.

INNIT URL" target="_blank">

Just replace the INNIT URL with your URL and it's done! =)


15 Ways To Get NANGs in INNIT


In order to use INNIT, one has to obtain the Nuffnang Glitterati status first.

Okay, the more NANGs you get at INNIT, the higher the chances of your submitted post gets to the Top 10 Popular Posts. Once your post is up there, your blog will gain more visitor - even though your post is sucky.

The trick is - if your submitted post gets more than 20 NANGs, it'll probably end up at the Top 10 Popular Posts in the last 24 hours.

Here are some simple ways to get NANGs for your submitted entries in Nuffnang's blog aggregator - INNIT.


1) Post about Nuffnang-related issues.

For example:
  • NANGs & DANGs in INNIT
  • Dedicate posts to fellow Nuffnangers
  • Nuffnang Events, Outings, Cheques & Competitions


2) Submit interesting topics.

For example:
  • Gaining Traffic, More Visitor Hits
  • Money, Earning Online
  • Porn, Sex, Boobs & Women


3) Post controversial issues.

For example:
  • Malaysian Politics
  • Hitting/criticizing on another bloggers
  • Defaming certain blogging styles

4) Use misleading title at INNIT.

For example:

You wrote about your teaching scolding you on your blog. Then when you submit on INNIT, you post the title as:

"My Teacher Fcuked My Ass! Pain! Child Abuse!"

There you go, everyone will be curious and click on the link. Dubious NANGs for you.

More real examples of misleading titles:


5) Attend Nuffnang events.

The more Nuffnang events you go to, the more active Nuffnang bloggers you'll meet. Once you get the know them better, the chances of them giving you NANGs for your submitted post is higher.


6) Go outings with Nuffnang bloggers. (Not related to Nuffnang events)

Same reason as Point 5.


7) Be a famous figure in INNIT.

There are some Nuffnang bloggers that are inactive in INNIT, but once they submit their post on INNIT, it gets NANG-ed so easily. Because everyone is hyped about them. How to be famous? Definitely socializing more with the other Nuffnangers.


8) Chat frequently on the Nuffnang Chatbox.

The more you chat, the more Nuffnangers you know. So when you submit a blog post, you can ask them to NANG it for you.


9) NANG other posts on INNIT aka "I-NANG-you, you-NANG-me".

When you NANG other bloggers' submitted INNIT posts, they might return the favour by NANG-ing on your submitted posts too. It's a win-win situation.


10) Use Twitter, Plurk or other "What Are You Doing" tools.

When you submitted a blog post on INNIT, update your Twitter with the link to the INNIT page of the post.


11) Use Facebook, Friendster or other social networking websites.

Post the link to the INNIT page of your submitted post on Walls, Bulletin Boards and etcetera. Other Nuffnang bloggers might notice and give you a NANG right away.


12) Promote in forums.

Post in forums regarding your submitted posts on INNIT. Who knows, there might other other Nuffnang bloggers using that forum too.


13) Add a "NANG IT!" button on your blog post.

Adding "NANG IT!" button at the end of your post can help too. Some Nuffnang bloggers might not come to your blog through INNIT. So providing a link back to the INNIT page of your post will allow them to NANG easily.


14) Tell other blogger friends to NANG your post on their blog's chatbox.

Just drop by their blog, say hi, leave the link to the INNIT page of the post and say "NANG ME! THX". If you have other Nuffnang blogger friends, just ask them to NANG for you. Smses, msn or phone calls will do the trick.


15) The right INNIT submission timing.

The time of your submission of your post in INNIT is important. Submitting your post at 6am in the morning won't get you NANGs because most Nuffnang bloggers are asleep. The encouraged time period to submit your posts is between 9pm to 1am. That's when most people are active.


So that's basically 15 quick ways to get NANGs for your submitted entries in INNIT. All the best!

P/S: Please don't use Point 4. It's not advisable to mislead INNIT users to thinking that you have a GREAT (or sex-related) writeup when the truth is that your post content is totally off from the title.


Disclaimer: Some points are not recommendable, do it at your own risk. The author is just stating all available ways to get NANGs.


Soccer, Alien & Princess Nuffnang XChange Widget


An additional of 3 more themes for Nuffnang XChange widget!


Soccer
Certainly for football enthusiasts.


Alien
Science fiction lover? This should be your choice.


Princess
A great design for all little princesses.

Check it out on the Nuffnang XChange Page now!


Metered Campaigns VS CPC Campaigns


Many are unsure about the differences between a Metered Campaign and a CPC Campaign. Here are the explanation.

Metered Campaigns

Metered campaigns are ads that are paid based directly on the number of unique visits a Nuffnang user contribute to the campaign.

A Nuffnang blog can be assigned more than one metered ad at the same time in the same slot, but the owner will not receive notifications about these assignments (because of the potential volume, and because the campaign duration may not be fixed).


Earnings for metered campaigns are also handled differently because metered campaigns usually last longer than normal paid ads. It might take a while before Nuffnang credits the earnings to the account. In the meantime, Nuffnang users can see the running total that he/she has earned for that campaign so far as "Buffered Earnings".

Also, Nuffnang is giving out CTR Bonus to reward blogs for good campaign performance. Nuffnang will give out bonus earnings for blogs that achieve a CTR (Click-through ratio) of 0.2% or higher on new campaigns that run on a blog. This figure is based on average industry standards.

With metered campaigns, Nuffnang hopes to achieve the following:
  • A better distribution of ads to more bloggers.
  • Lower fatigue resulting in better click-through ratios.
  • More income since we can now run multiple advertisers on a single ad unit.

CPC (Cost-per-Click) Campaigns

Earnings for a CPC campaign are calculated based on the number of clicks a particular Ad Unit had in the past week. Usually it's 25cents per click for Glitterati members and 15cents per click for non-Glitterati members.


However, multiple clicks from the same computer with the same IP address & Mac Address will be considered as spam and as a result, the earnings will be reduced/removed. A warning will be issued by Nuffnang personnel too.


Information obtained from Nuffnang.
Feel free to correct me if there are any mistakes above. Thank you.
*thanks Robb & Caffery for the corrections*


New Nuffnang Widget - Nuffnang XChange


A brand new widget created by Nuffnang to drive traffics among Nuffnang blogs.

The widget consists of three tabs:

The RSS tab
Pulls some of the latest posts from blogs that also have the widget on.

The Innit tab
Updates itself with the latest posts from the Nuffnang aggregator INNIT.

The Status tab
Gives Nuffnang users a space to leave a message or thought for the readers. It can be updated from the XChange page of Nuffnang website. However it's a redundant feature as most users prefer it to be integrated with Twitter.

Take notice that it's only accessible by Glitterati members.

Here are 2 ready widgets for Nuffnang users to select:


Currently Nuffnang has launched XChange with the Compact and Flower themes. They're also providing skins for the widget for users to choose from to fit their blog theme, and there'll be more to come!

Check out more themes here!

In my personal opinion, the Nuffnang Xchange is a totally awesome widget but it might:
  • slow down the blog loading time.
  • block the blog template if the blog template is really wide, for example: the Flower XChange widget is taking up too much space.
Anyway, do add it up. It's a great service!

Great work Nuffnang!


Guide to Using INNIT @ Nuffnang


In order to fully utilize INNIT, the blog aggregator, by Nuffnang, you have to obtain Glitterati status first.

Here's more or less the interface for INNIT.

Firstly, the Most Popular posts will be shown at the top middle of the page.


It looks simple and understandable. Before being allowed to publish your entries on INNIT, you must first obtain Glitterati status and then you have to log in again. The log in panel is on the left (based on the INNIT webpage of Nuffnang Malaysia). Upon logging in, you're allowed to submit your entries. Just click on the "Add New Post" to do so.

All you need to do when you add a new post is write the title, description and the tags. Then just copy-and-paste the permalink of the entry from your blog. As simple as that.


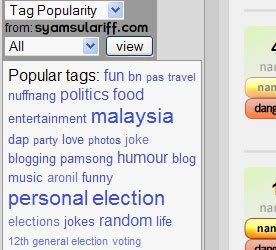
On the left below the log in section, the popular tags will be displayed. So feel free to browse thru the tags for more entries with that interests you. There's a search function too, therefore you can search for certain keywords.


After submitting your post, it'll be shown on the dashboard below the popular posts. Other INNIT users can then nang your post if they like it, or dang your post if they dislike it. Well, the nang and dang system isn't that practical as most of the INNIT users nang and dang for no apparent reasons, or just for fun.

Nevertheless, the more nangs your post gets, the more chances for it to reach the "Most Popular" area.


Anyway, there's a Nuffnang chatbox located on the right of the INNIT page. There, active INNIT users will chat with each other. Some might use it as a promotion area - begging asking online INNIT users to nang their submitted posts. Beware you might get danged, also, for promoting on the chatbox.

That's pretty much of it. Enjoy!


Display your current location on your blog with Google Latitude


If you use Google Latitude, you can now display your current location on your blog using a Google Public Location Badge.


Google Latitude is a feature of Google Maps which, should you choose to enable this, allows selected friends and family members to see your location. You can also give permission for Latitude continuously update your location in the background.


The Public Location Badge is a gadget which you can easily add to your Blogger blog to provide readers with your current location. This feature may be especially useful for travel bloggers or personal bloggers who wish to share their location with friends and family members.


How to add a Public Location Badge to your Blogger blog

In order to add a Public location badge, you will need to use Google Latitude. If you have a compatible mobile phone, you can install the latest version of Google Maps on your handset and use this application to update Latitude with your current location. Those who do not have a compatible handset (or who choose not to use this option) can add Latitude to iGoogle and interact with this application from their desktop/browser.


Visit this page to choose which method you will use to update Latitude with your location.


Once you have set up your handset or iGoogle Latitude settings, you can visit the Latitude settings page to choose with whom your location is shared or add a Public Location Badge to your blog.


Choosing which settings to use for sharing your location

When you visit the Public Location Badge page, there are several options available to choose how your location will be shared:

  • Disable Google Public Location Badge (default setting) - this means that no-one will be able to view your current location, except of course for Google and any friends with whom you have chosen to share your status.

  • Enable and show city-level only - this setting enables anyone to view your location at city level only (not your actual, precise location). Even if you have not added the badge to your blog or website, your status may still be accessed through Latitude searches.

  • Enable and show best available location - this setting enables anyone to view your location on a more precise level. Again, even if you have not added the badge to your blog or website, your status may still be accessed through Latitude searches.

Your choice will depend on your personal preferences. If you have set up Latitude but prefer your status to remain private, be sure to disable your public location badge. And if you do choose to share your location through a badge on your blog, be sure to take into account Google's privacy notice:


If enabled, your location will be publicly available to everyone. You will not be able to limit where and with whom you share your location through the badge.


Add the badge code to your Blogger blog

It is very easy to add your public location to your Blogger blog. Once you have chosen the settings and tweaked the width and height of your gadget according to your needs, you can simply press the "Add to Blogger" button which will transfer the code directly to an available widget location in your layout:


After adding your gadget to your blog, you can visit the Layout>Page Elements page to move the gadget to an appropriate location in your blog's layout.


Another option would be to paste the code for your location into a blog post. Simply copy the HTML code in the box to your clipboard, then paste into a blog post when editing using the "Edit HTML" tab. This will embed your gadget directly into your blog page.


Important note: once you create and publish this snippet on any web page, anyone with access to your web page could copy the code elsewhere so that your location is still accessible even after you remove the code from your page. If you want to stop broadcasting your location, you must disable this by visiting the Public Location Badge page.


Will you be using the Public Location Badge in your blog?

Personally I prefer not to use this gadget in my own blogs, since this has no relevance for the subjects I write about, but as I mentioned earlier, this new feature may be a useful gadget for travel bloggers or those who wish to update family and friends with their location.


Have you added this gadget to your own blog? Or would you consider using it? Please let us know your opinions and experiences of the Public Location Badge by leaving your comments below.


Earning Nuffnang Glitterati Status


In order to achieve Glitterati status in Nuffnang, one has to be loyal - in the sense that other Blog Advertising Companies' Ad Units (decided by Nuffnang) mustn't be on the blog. In simpler words - you will not maximize your Nuffnang usage if you use other advertisements that aren't allowed by Nuffnang based on its Nuffnang Exclusive Program.


Usually other South East Asia (SEA) Blog Advertising Companies' Ad Units aren't allows to go together with Nuffnang's advertisements. But it depends.

So far here are some Blog Advertising Companies that will prevent you from obtaining Glitterati status.
  • Advertlets
  • Adgitize
  • if there are others, please notify at comment section TQ
But nevertheless, all the best to them too! No offense ya, but I just have to mention the competitors. Afterall, this is I LOVE NUFFNANG blog.

For your information, Google Adsense are allowed on blogs with Nuffnang Ads. Nuffnang won't strip off your Glitterati status if you sign up for Google Adsense.

Cheers! =D


Why You Should Join Nuffnang Glitterati


1) Payment Rates for both Cost Per Unique Visitor and Cost-Per-Click.

The less ads a blogger has on his blog, the higher share of voice and the less each ad will have to compete with other ads for attention. Hence, the higher the CTR and the higher the value of that particular ad space on the blog.

That is why for example you will never see 8 different ads on the same page on a newspaper unless it’s in the Classifieds where each advertiser pays a small amount.

As a result of that, Glitterati Nuffnangers will earn 20-40% more than ordinary Nuffnangers.

2) Payment Terms

In the advertising industry just like in many industries, payment from advertisers come from specific terms like 60 or 90 days. In the past, Nuffnang has used its cash reserves to pay off bloggers for campaigns that we still have not been paid for by our clients. Due to the great increase of bloggers in the Nuffnang community, we are no longer able to provide this service for all our Nuffnangers and unfortunately will have to restrict this service to Nuffnang Glitterati.

However, all Nuffnangers will still be paid in a timely manner as stipulated in the Program Table.

3) Advertorial Opportunities

Many bloggers know that while banner ad campaigns earn a decent stable income, it is advertorials that pay the most. Each advertorial depending on the advertiser, commitment and traffic can earn a blogger a minimum of RM 50 to RM 1,500 not including freebies that may sometimes be included.

In the past, advertorial opportunities were available for all our Nuffnangers. However, due to the high demand for advertorials and the need for us to narrow down which blogger of the thousands will get advertorials, only exclusive bloggers will now be eligible for advertorials.

4) Community Events

Nuffnang is known to organize the biggest community events ever which range from free movie screenings, lunch meet ups and many more. We find that in many of these events, many Nuffnangers would like to bring guests along with them and we at Nuffnang would like to oblige as much as we can.

As such, 70% of the seats for each event will be allocated to Nuffnang Glitterati AND the guests they may bring.

5) Contests

Contests among Nuffnangers have been something we’ve been having quite a lot with many bloggers winning everything from free meals at Friday’s to mobile phones or even the upcoming contest of a free trip to Gold Coast. With the high demand for these contests, we will give priority to Nuffnang Glitterati with 70% of the prizes to be allocated to them and the remaining 30% to be allocated to non-Nuffnang Glitterati.

6) Innit

Innit is a tool developed and hosted by Nuffnang to add the additional service of driving traffic to any Nuffnang blog. This tool will now only be restricted to Nuffnang Glitterati since it is within our best interest of our community not to indirectly drive any traffic to a future competing network.

The vast majority of the Nuffnang Community is already eligible for the exclusive program so there isn’t much to worry about. All of us at Nuffnang sincerely hope that this new initiative will show how much we do appreciate your loyalty.


Taken from: Nuffnang Exclusive Program page as of entry date.
Any upcoming changes made by Nuffnang will not be notified here unless mentioned.


Nuffnang Blog Aggregator - INNIT


Nuffnang itself has a blog aggregator, called Innit by Nuffnang users, where users can post up their entries from their own blog. Therefore, other Nuffnang-Innit users will be able to read entries that interest them.

There'll be a Nang & Dang system whereby other Innit users can Nang if they they think your entries are cool, or Dang if your entries suck.


In order to post up entries on Innit, Nuffnang users must first acquire the Glitterati status. Sounds like glittering huh? Anyway, The Glitterati thingy is well-related to Nuffnang's Loyalty Program. In order to maximize your usage (and earnings too) in Nuffnang, you'll have to be loyal. Read more about the Nuffnang Glitterati status if you're interested.

More explanation on achieving Glitterati status later on. Stay tuned!


Adding Ad Unit To Your Blog


Some Nuffnang users might find it complicated when it comes to adding an advertisement unit (aka Ad Unit) to a blog. There are guidelines prepared by our beloved Nuffnang for a few well-known blogs but I guess human always miss a thing or two at times.

Here are the guidelines (aka tutorials aka How-To-Add-Nuffnang-Ad Units-For-Newbies) linked from Nuffnang.


Anyway, here are some other tips when adding the Ad Units to your blog - only for Blogspot as it's the only blogging platform I've been using so far.


Leaderboard Ad Unit BELOW Blog Header

After inserting the Leaderboard Ad Unit code, the Ad Unit is located above your header. Sometimes the blog doesn't look nice with the Ad Unit first. Well, it you want to relocate the Leaderboard Ad Unit to below your header, here's how.
  • Go to your Blogger dashboard
  • Click manage: Layout
  • Click 'Edit HTML' below the Layout tab
Then paste the Leaderboard Ad Unit code before this line:


There you go. The Ad Unit will appear below your blog header.


Skyscraper Ad Unit with Page Element

For the Ad Unit for your sidebar (aka Skyscraper Ad Unit), you can simply paste the code to a HTML/JavaScript element on the Page Elements Page.