How To Add Feed Icon in Blogger Blog


How to create feed icon on blog?
How to add feed button on blog?


First, go to your Layout.

Dashboard > Layout

Then, add a new gadget and select HTML/JavaScript.

Add this code.

your feed URL" target="_blank">feed image URL"/>

Blogger's default feed link is usually http://domain.blogspot.com/feeds/posts/default. You can put this feed URL above. However, if you have registered with Feedburner, you can use your Feedburner's ULR there, which is more recommendable.

Feedburner's feed URL is usually http://feeds.feedburner.com/yoursite.

For the image URL, you can search for feed icon images and get the image link, preferably in .png or .gif format if you want an image with invisible background.

More feed icons can be obtained here! Enjoy!


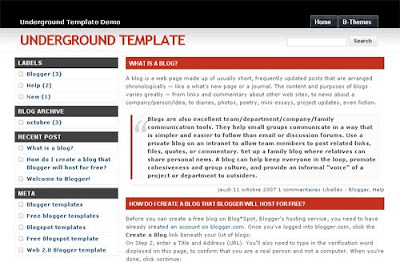
Download Underground Blogger Template


Underground Blogger Template

Template name : Underground Blogger Template

Type : New Blogger Template (XML),Top Navigation Bar,Search Box,2 Column, 1 Sidebar, Left Sidebar

Demo|Download


Instant Related Post Widget For Blogger


1.Login to your blogger dashboard--> layout- -> Edit HTML

2.Click on "Expand Widget Templates"

3.Scroll down to where you see this:


4.Now Copy below code and paste it just after above code.


Related Posts :


5.Click on "Save Templates" and now you are done.


Download Grey Press Blogger Template


Grey Press Blogger Template

Template name : Grey Press Blogger Template

Type : 3 Column, 2 Sidebar, Right Sidebar, Search Box, feed Button

Demo|Download


Download Blogy Glass Blogger Template


Blogy Glass Blogger Template

Template name : Blogy Glass Blogger Template

Type : New Blogger Template (XML),2 Column, 1 Sidebar, Right Sidebar, Top Navigation Bar,About me section,beautiful header

Demo|Download


How To Add "Share On Twitter" Button to Wordpress


It is very simple.Copy below code and paste it on your single.php file, within the loop:

Click to send this page to Twitter!" target="_blank">Share on Twitter


Now you are done.It will look this:


How To Add Favicon To Blogger Blog


How to add favicon?
How to create favicon for blog?

Here is a simple way to create a favicon for your very own blog!

Firstly, an icon is required. You can either use an online icon creator (which I think is not user-friendly) or Photoshop.

Once you've designed your icon, save it as an image file. Next, proceed to the online icon generator to generate the icon. There, upload your saved favicon image, select icon size 16x16 and generate it. Once it's done, download the icon into your computer.

Then, upload the downloaded .ico image file to the Internet, use Windows Live SkyDrive or any image uploader that supports icon, and get the icon URL there.

Attention: To get the right icon URL after uploading to SkyDrive, keep clicking on the image until it appears on the browser by itself. Then copy the URL from the address bar.

Next, follow this instructions.
  • Go to your Blogger dashboard
  • Click manage: Layout
  • Click 'Edit HTML' below the Layout tab
There, you'll see a code line like this:

<data:blog.pagetitle/>

Then, copy and add the code below the line and replace "your favicon URL" with your favicon's URL.

rel='icon'
type='image/vnd.microsoft.icon'/>

Save it and have a look at your blog. You should be able to see your small Favicon next to your blog address.

Take note: If you're using older versions of Internet Explorer, you might not be able to see the icon. Firefox on the other hand shows the icon well in bookmarks, URL addresses and tabs.

Hope you'll like it. Feel free to ask if you've any doubts. =)


Promote Blog With Bloggerunited


Here's a great site to promote your blog to a blogging community - Bloggerunited.


Whenever you log in to Bloggerunited (BU), your latest blog post will be displayed on the main page, allowing more chances for other BU users to see and read your post.


So when you keep logging in, there are more chances for other BU users to know about your blog. Here's an example of what will be shown when you log in.


It contains the latest post title, together with an excerpt and the first picture of your blog. So to attract more visitors from BU, you should always have a nice first picture! You can tweet any posts on BU too, just click on the Tweet button to tweet the post.

Also with BU, you can favourite blog posts by other BU users and they'll be displayed in the Favourite Blog Posts list. In return, other BU users can favourite your posts back, if they like yours too.


You can also stand a chance to be listed under Popular Bloggers of The Month if you're active in BU.


There is actually an invisible point system for every user, to calculate your activeness in BU. For example, visiting other blogs, discussing in the forum called Lounge, doing blog reviews, favouriting blog posts, providing referral and a few more - will gain you points.

So the more active you are in BU, the higher the reward. It's your hard work and effort after all.

Not forgetting the forum in BU called Lounge, where BU users can bring up topics and discuss with each other.


If you're very active on a particular day, you gain more points and your chances of being Featured Blogger of The Day will be higher. By being featured, your recent blog posts will be displayed and it can promote you blog better.


It is a great community to engage and get to know more bloggers, especially around Malaysia and Singapore. Friendships could be made too, who knows?

You can be in the Popular Today list or have your blog posts in the Popular Post Today too. The more presence you have in BU, the more BU users know about you - giving your blog more promotion.

Lastly, the BU users can vote their Favourite Bloggers. The more votes you have, the higher you climb up the Favourite Bloggers list.


Besides all those that have been mentioned, there are more features that you will be able to use. Keep exploring and you'll master The-Art-of-Bloggerunited! In fact, it's user-friendly and easy to be used!

So what are you waiting for?


Feedburner: How To Get Feed Count


How to get feed count from Feedburner?
How to know the number of blog subscribers with Feedburner?
How to know the feed count of blog?
How to obtain feed count with Feedburner?

If you don't have a Feedburner account yet, register now. It gives you better management on your Blogger feeds.

Proceed to How To Replace Blogger Feed with Google Feedburner first.

1) Log in to your Feedbuner account.

2) Select your feed and click on "Publicize" tab above.


3) Then, click on "Feed Count" under the Services.


4) Select your preferred feed settings.


5) Click "Activate" button after configuring the feed settings.

6) HTML is generated later on.


7) Copy and paste the code and put it in your blog.

Sample: Simple Blogger Tips' Feed Count:


It will update automatically as you get more subscribers.

The count can be increased when people follow your blog, link your blog with Blogger's Blog List and subscribe to a reader.

Enjoy!


16 Useful Twitter Tools for Blogger


Since it's launch back in 2006, Twitter has become a leading pioneer in the world of social media. Bloggers in particular find this service an invaluable tool for syndication, news stories and community conversation.


For this post, I have rounded up 16 of the most useful tools, tips and free resources to help you get the most out of Twitter through your Blogger powered blog.


Display your Latest Tweets

Visitors to your blog may also enjoy reading your Tweets, particularly if they are of relevance to your blog's niche subject.


Here is a selection of the best tools for displaying Twitter updates in your Blogger layout:

The Official Twitter Badges

Twitter provides an animated "Profile" badge which you can use to display your latest updates as a widget in your blog layout:


You can configure the size, colours and number of updates for your badge in the settings, then grab the code which can be pasted in an HTML/JavaScript widget in your Blogger layout page.


Another alternative is the Twitter "MySpace" gadget, which uses Flash to create a different appearance to the gadget:


We can copy the code generated for this widget and paste into an HTML/JavaScript widget in our blog - it's not limited only to MySpace profiles!

Blogger Widgets and Gadgets

Another way to display your Twitter updates is to install a Blogger widget or gadget in your layout. These can be configured to display as few or many Tweets as you choose, and require only your Twitter username to install:


Simple Twitter Updates Widget

This was the first Twitter application I created for use with Blogger blogs and still remains one of the most popular tools on the site! To install, simply fill out the form and click "Add Widget" to install automatically in your layout.


Twitter Gadget for Blogger (EN)

This gadget works in much the same way as the Twitter Updates widget but is simpler to install and can be reconfigured after installation.


Twitter Updates Gadget (ES)

Daniel Ikeda has made a Spanish translation of my Twitter Gadget for easy installation.

TwitSig - Your Tweets in Pictures

TwitSig is an interesting free service which allows you to display your latest Twitter update as an image. You can add this in your layout as either an HTML/JavaScript widget (using the code generated on the TwitSig homepage) or as an Image gadget using one of the alternative backgrounds.


Here's an example of the default Twitsig badge:


This one uses magnets:


Here's another using a fortune cookie:


Visit TwitSig to generate your own updating Twitter updates image.


Add a "Follow Me" Badge

To encourage your blog readers to follow you on Twitter, try adding a "Follow Me" badge which links to your Twitter profile page.
Here are some useful tools and badges which you can use to add a linked "Follow Me" badge to your Blogger layout:

Twitter Follow Badge by Go2Web"0.com

Here's a new and interesting way to add a non-intrusive "follow me" badge to your site, like this:
The badge can be configured for different colour schemes, height from the top of the page and left/right alignment.
To add the badge to your Blogger blog, visit the TwitterFollowBadge page and fill in the form to your requirements. This will generate some JavaScript code which you should add just before the closing tag in your Blogger template. However, in it's native form this code will not display in Blogger!
Instead, we have two options:
  1. Paste the JavaScript into an HTML/JavaScript widget instead

  2. Replace <-- and --> in the generated code with <-- and --> (this enables the script to function correctly and display the badge in your page)


TwitterButtons.com

TwitterButtons offers several pages of free "follow" buttons to help your blog readers follow you on Twitter:


Simply add your Twitter ID in the space provided and TwitterButtons will generate the code to add the button of your choice as a linked badge in your layout. Paste the code into an HTML/JavaScript gadget in your layout (or directly in your template if preferred!) and you're all set.


Twitter Buttons by Vincentabry.com


This site offers 31 different styles of Twitter buttons which you can add to your blog. Although the site is not in English, the Twitter buttons are.


To add these to Blogger easily, use your favourite image in a Picture gadget in the layout, then link this to your Twitter profile:


Add "Tweet This" Links to your Blog Posts

Twitter is an excellent service for syndicating blog posts and useful or interesting articles. Help your blog readers share their favourite posts on Twitter by providing a "Tweet This" link for each of your blog posts.


Here are three different ways you could do this:


Add a simple "Tweet This" link

The simplest of all Twitter syndication links is a text link which uses the URL and title of your blog post:


There are of course many ways in which this link could be styled, and where it could be positioned. For now I'll explain the most basic method of installation.


Go to Layout>Edit HTML in your Blogger dashboard and check the "Expand Widget Templates" box.


Then using your browser search function, locate the following line of code (or similar):

Immediately after this line, paste the following section of code:

Tweet This
Be sure to replace "YOUR-TWITTER-USERNAME" with your own username!


Then save your template. This will add a "Tweet This" link in the post-footer section beneath each blog post. Readers can click this link to post a pre-filled template "Tweet" like this:


Image based "Tweet This" Link

If you'd prefer to use a stylish button or larger image link, you can simply replace the text from the previous example with an image tag, like this:


Tweet This
Here's a great example of this effect on PSDrecipes:


Using Short URLs in "Tweet This" Links

Many of us use lengthy domain names which take up much of Twitter's 140 character limit for the tweeting of posts. 


A while ago I posted a tutorial explaining how to enable short URLs for "Tweet This" links using Bit.ly. This explains how to add a similar text/button/combination link for each of your Blogger posts which adds a shortnened URL to the Twitter post template instead of the regular, lengthier one.

Enable "Tweetbacks" in your template

Our Blogger templates already support "Backlinks" (known as "Links to this post" in Blogger). However, these backlinks don't display links generated on Twitter which usually include shortened URLs.


Dan Zarella's original "Tweetbacks" script is JavaScript based and can be used in Blogger templates to display tweets about your post. It is very easy to install and requires no customization (unless you wish to style how the tweetbacks are displayed).


To add "Tweetbacks" to your Blogger blog, simply copy the code below and paste this in your template where you would like the Tweetbacks to appear:

The simplest installation is to paste this code into an HTML/JavaScript widget in your Blogger layout. This will display Tweetbacks on every page of your blog, and will show the Tweetbacks attributed to each individual page.


Another possibility is to add Tweetbacks beneath the "Links to this post" section of your template, effectively grouping these tweets with backlinks to each individual post.


To achieve this, go to Layout>Edit HTML and check the "Expand widget templates" box. Then search for the following line in your template:

Immediately after this line, paste the following section of code:

Tweetbacks


This will add Tweetbacks with the appropriate title just above the "Links to this post" section of your layout.


Note: you must configure "Backlinks" to "Show" in the Settings>Comments section of your dashboard to enable this method to work.


Add TwitPic Updates to your Sidebar

TwitPic enables us to share images to Twitter, which can be posted by phone, using the TwitPic API or directly from the TwitPic site.


I've developed a gadget which you can use to display your recent TwitPic updates in your Blogger layout which is easy to install and can be configured to your needs:


Use this link to add TwitPic Updates to your Blogger blog.


Add "Real Time" Twitter Updates

Being a fast, virtually instantaneous stream of updates on any given subject, many of us like to keep up with references, news and re-tweets in real-time, rather than having to update or revisit Twitter search at periodic intervals.


Here are two highly useful gadgets for blogger which can be used to display real-time updates in your actual blog layout:


Twitter Search

Developed by 32Hours.com, this gadget offers a stream of updates for a given search term, hash tag or username.


Simply add the gadget to your blog and change the terms for search after installation (your readers can use this too!):

Visit this page on 32Hours.com to learn more about this gadget and install in your Blogger layout.


Juitter Gadget - real time updates with configurable search terms

Based on the excellent Juitter JQuery plugin by Rodrigo Fante, this gadget enables real-time Twitter updates based on the search terms you specify on installation. You can choose to display tweetbacks referencing your Twitter username, a particular search term and even combinations of terms:


This gadget does not contain ads or added links, and can be configured to display exactly as you want.


Click here to add this Juitter gadget to your blog.


Have I missed anything out?

I hope I've provided a good round-up of Twitter tools which you can use to "Twitterize" your Blogger powered blog. If you feel I've missed out any Blogger-enabled tools, please feel free to let me know about these in the comments below.


Free HTML and CSS Tutorials at BeepTheGeek.com


Many of my tutorials here on Blogger Buster help Blogger users learn how to customize their Blogger templates by manipulating the template code. When customizing our Blogger templates, we need to use a combination of HTML tags and CSS in addition to Blogger template tags.


While I try to make my tutorials easy to follow, I understand these are also contextually aimed at a specific task, and that many of you would like to learn more about HTML and CSS in general in order to make your own unique customizations and templates.


Over the weekend, Gagan of BeepTheGeek.com let me know about a new course he has started to help bloggers learn the basics of HTML and CSS: HTML Tutorials. This is a weekly course specifically designed for those who want to learn the basics of web design which is just as important for customizing Blogger templates as designing stand-alone web pages.


Beginning with an introduction to HTML tags, Gagan hopes this free online course will enable everyone to understand the basic concepts of HTML and how this may be applied to blog template design:


The series will include all HTML concepts and will teach you everything about HTML along with CSS tips and tricks for fast and easy designing. I’ll start from the basics so that each and every concept is clear to you. By the end of the series you will be able to edit your templates.


At the end of the course, Gagan will publish the entire series of tutorials in an eBook for easy reference. 


I hope this free course will be of interest to those of you wishing to learn more about Blogger template design. Pop over to BeepTheGeek.com to take a look at the course and let us know what you think.


Image credit: eelke dekker